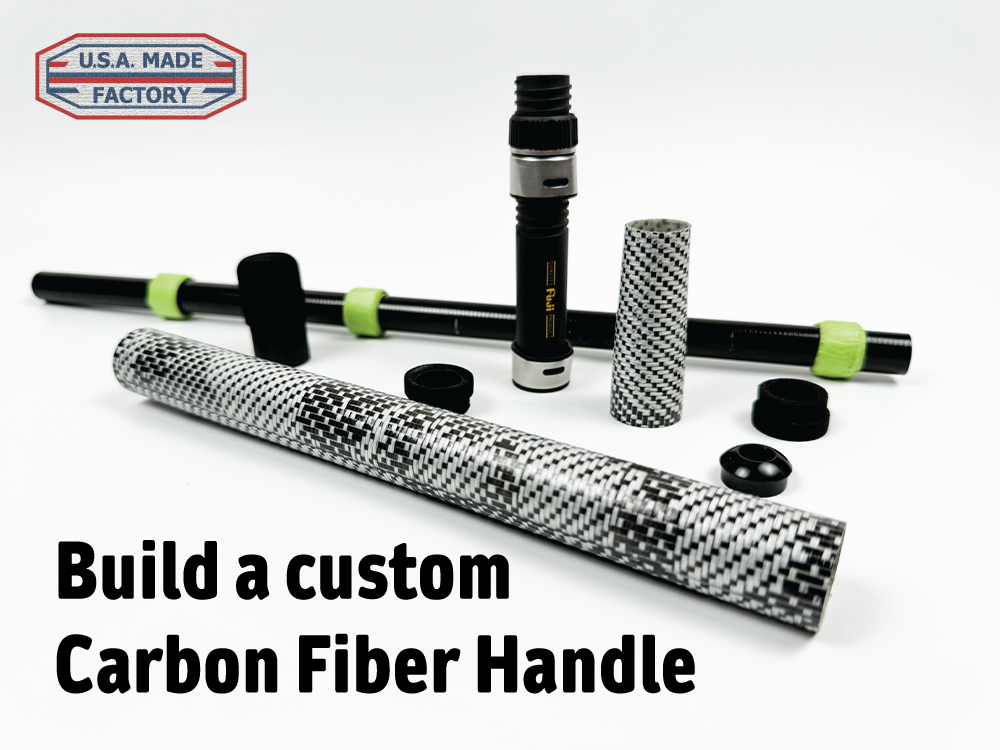
Today, we want to show you the steps we take to build our custom carbon fiber grips. This is an awesome system, pretty straight forward and gives you a ton of options. We've been designing this system with several industry leaders to give the rod builders a ton of options. Below are some of the steps to build a custom handle like this one below.

This is the checklist for what products you need and steps to take.
Tools Needed
- 2-part Epoxy like Rod Bond
- Tape arbors (or whatever you want to use as an arbor)
- sandpaper or abrasive tool
Parts Needed
- Reel seat insert 18" long. Size depending on the reel seat size. 16mm, 17mm, 18mm.
- 16mm, 17mm, 18mm, Reel Seat of your choice
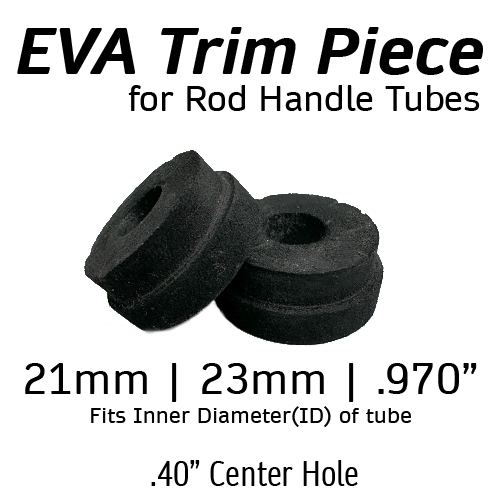
- 21mm, 23mm or 970" EVA Ring (we chose the 21mm)
- 21mm or .970" Butt Cap (we chose the 21mm)
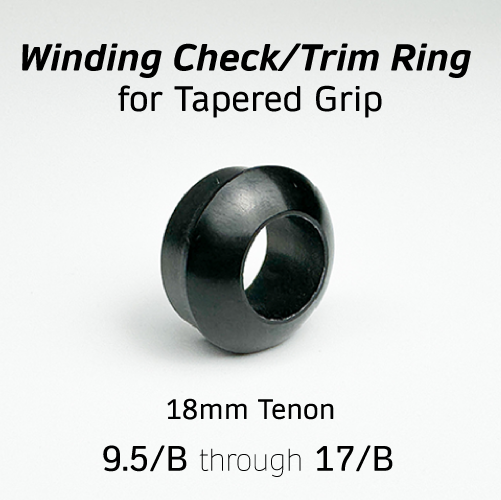
- Metal Winding Check - 18mm Tenon : hole size depends on your blank ( we went with the GSHSGWC-9.5 for the size of our blank)
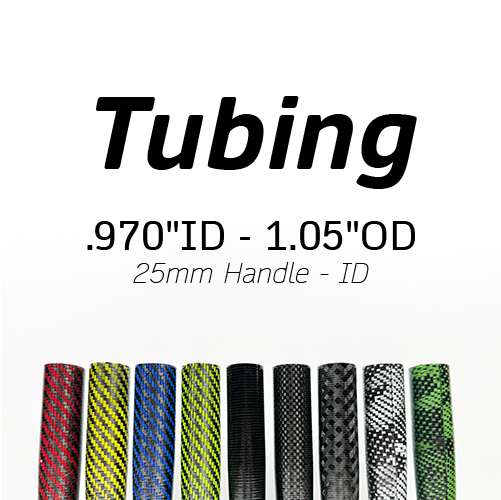
Choose tapered or parallel tubes for your rear grip and foregrip for the design of your choice. For this build we chose to do a parallel white camo handle that's 812"ID - 860"OD tube. This handle fits our 21mm EVA rings and our 21mm butt cap.

Step #1 - Glue your 16mm reel seat to the 18"long 16mm Reel Seat Insert (usamadefactory.com) in the location of your choice. Make sure to pre-fit everything and mark the tube. (if you don't want a foregrip then glue the seat flush with one end.)
Step #2 - Slide your EVA Trim Piece with .40 Hole - Fits .970 | 21mm | 23mm (usamadefactory.com) on each side of your seat and glue them in place.
Step #3 - Arbor the 16mm reel seat tube for foregrips and rear grips. (We used green masking tape) *picture shown above, please note the reel seat would already be glued in place)
Step #4 - Glue your taper foregrip 21mmID_23mmOD (usamadefactory.com) and your rear parallel grip 812ID_860OD (usamadefactory.com) in place.
Step #5 - Glue your Butt Cap in place. Tape all pieces in place and let set overnight.
Your handle is now ready to receive your blank.
Step #6 - Arbor your blank to fit your new custom handle. You don't have to put the entire blank inside the handle. We recommend you have a min of 4" of your blank glued inside your handle. This allows you to make your finished rod the exact length you want.
Example - Handle is 18" long + blank is 72" long. Arbor the last 4" of the blank and glue it into your 18" long handle. This will make your finished length 86" long.
Step #7 - Glue your blank inside the handle to the desired depth and align your blank up with your real seat.
Step #8 - Slide your 18mm metal winding check down the blank and glue it into your foregrip.
Find all parts at USAMadeFactory.com